Filmora
Filmora is one of the best video editing software provided by Wondershare. It includes computer software (Windows & Apple), online tools, and mobile software. I personally use this and recommend it because it can run even on a computer with average performance.
Next, we will learn how to work with Filmora
- Here we must first select the Project Aspect Ratio
- Below that you will see both New Projects and Open Projects, New Projects will allow you to get new projects and Open Projects will get your already saved projects.
- You can view your already saved projects in the Projects Library on the right.
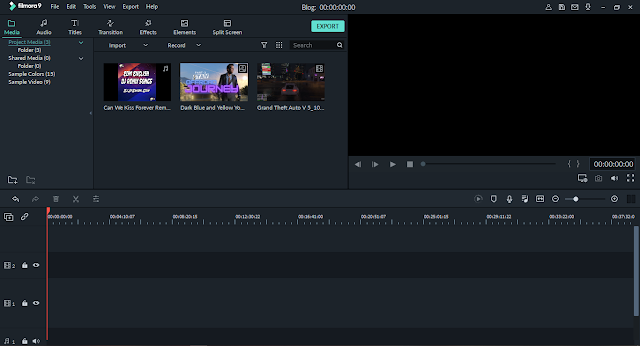
- This is where you do all your editing.
- Here you can view several main menus namely Media, Audio, Titles, Transition, Effects, Elements, and Split Screen.
- Next, we will talk about this one by one.
01-Media
Under Media, you can view all imported photos, videos, and audio and also see the default sample colors and sample videos sent by Filmora.
02-Audio
Under Audio you will see the default audios sent by Filmora. NB: If you use this audio for posting on social media like YouTube, be careful because copyright is being attacked.
03-Titles
Under the titles, you will find different types of titles, many of which come with transitions.
04-Transition
Here you can see many types of transitions that can be used for your editing.
05-Effects
Here you can see many of the default effects from Filmora.
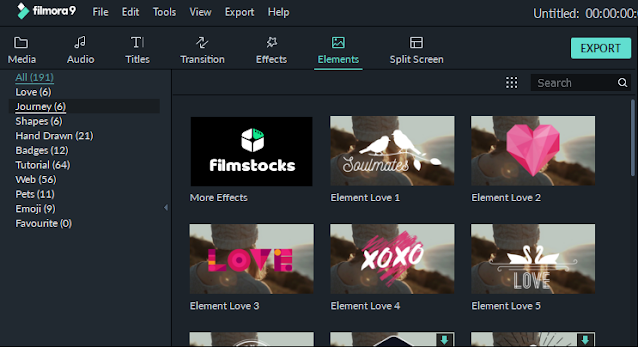
06-Elements
You can find many different elements for your editing here.
07-Split Screen
This is the last main menu that allows you to easily split your screen into two or more sections.
TimeLine
- This is the Timeline section, which is used for your editing, you can easily drag and drop what you want here, view your pictures, videos, audio, and more separately, and put them where you want them.
After import to Timeline
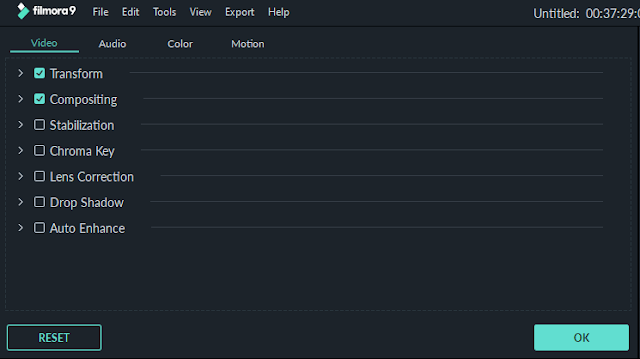
- After importing your media files to the timeline, you can access this menu (settings in that media) by right-clicking on the desired media.
- Or you can access these menus by double-clicking on the desired media.
It is possible to make your video settings under Video.
Clicking on Audio lets you make changes to the audio.
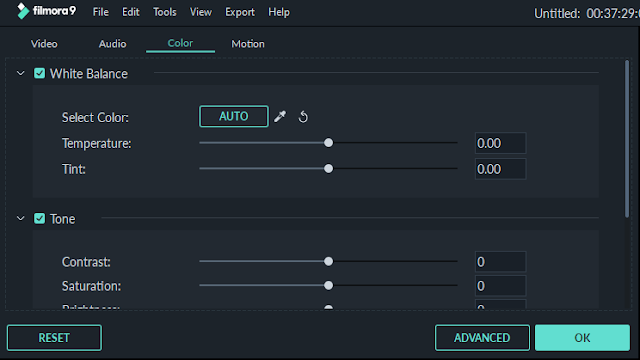
Color is where you allow changes to the colors of your video
Under Motion, you can add the required motions to your media
Import / Export
- You can access this window by clicking on Import Media Files Hire. Then you need to select the ones you want and click Open, or you can easily drag and drop the contents of your computer to Import Media Files Hire.
- After all your editing is done, you can access this window by clicking Export, where you need to select the format you want, name the video, and select the location where you want to save it.
- If you want to get advanced settings you need to click on Settings here.
- This is the menu that you will get by clicking on Settings. Here you can export the video by making the required settings and then clicking OK and finally Export.


.png)


.png)


